


How to Deactivate Automatic Updates in Windows 10
Microsoft has made its update compulsory for every Windows 10 user

Microsoft has made its update compulsory for every Windows 10 user. Windows 10 automatically checks for any new updates in the background and downloads them without notifying users. While it looks great in theory that updates, downloads, and installs automatically in the location, it’s not convenient for some users.
Suppose you use your smartphone as a hotspot to connect your PC to the internet. Many times it happens that you have limited data available to use. In such cases, the windows update process often eats all their data in the downloading and installation process.
How should we deactivate automatic updates in Windows 10?
The question has many potential answers. Microsoft lets you take control of this update process, but these options are hidden, and also there are limitations to this process. Windows 10 Home edition users have no way to stop security updates; it will automatically download and install in the background (as it is not handled by the windows update service). Also, Windows 10 Home users don’t have access to the group policy editor. But there are other ways by which you can prevent updates from automatically downloading.
Word Of Advice: I recommend leaving an automatic update in general. Typically going to this setting as they are is a good thing as it delivers essential security updates and bug fixes.
Following are the methods that illustrate how to turn off automatic updates in Windows 10?
Method 1: Set up a Metered Connection
You might use many WiFi networks for your work, and you don’t want your updates to download over the specific network. In this case, you can set up that network as a “Metered connection.” Windows won’t download updates automatically over Metered connection to save bandwidth. But still, Microsoft said that updates classified as “Priority” would be downloaded automatically over Metered connection.
Here are the steps to set up a Metered Connection:
- Open Settings (Windows Key + I).
- Go to Network & the Internet.
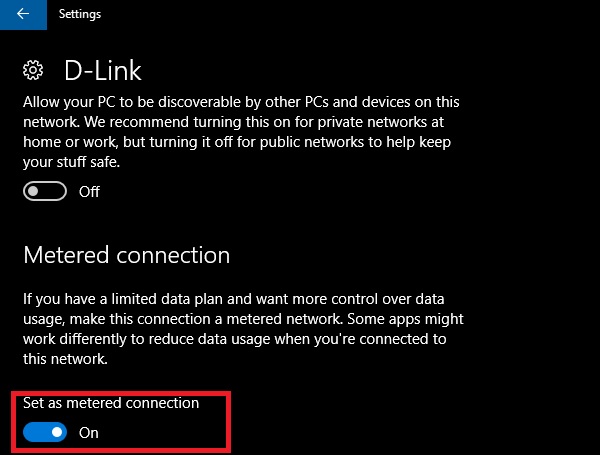
- Open WiFi; if you are currently connected to a WiFi network- click on it, turn it ON- Set as Metered Connection.
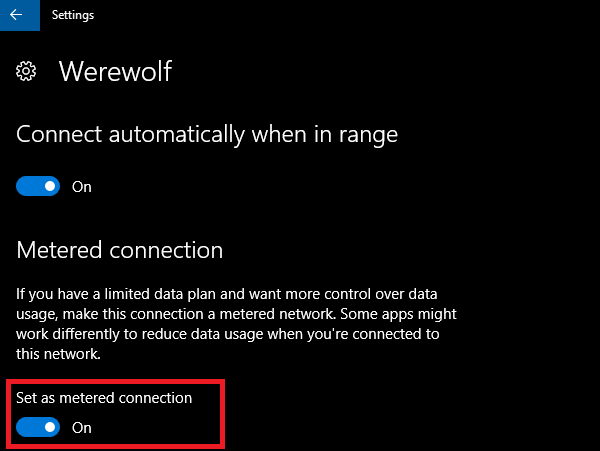
- If you want to set another connection as Metered, go to Manage known Networks- Click On the desired Network→ Properties→, Turn ON Set as Metered Connection.
Note: The above method only works with a WiFi connection. If you use an Ethernet cable to connect to the internet, it can’t be set as a Metered Connection.
Method 2: Group Policy Editor
This method will notify you whenever a new update is available without automatically downloading them (This is how previous Windows OS updates used to work). But again, security updates will be installed automatically in the background.
Note: Windows 10 Home users don’t have access to the group policy editor; only Windows 10 Pro, Education, and Enterprise editions will use this method (Windows 10 Home users can use an alternate registry hack method).
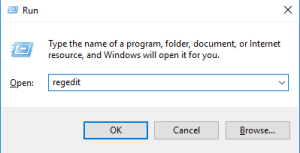
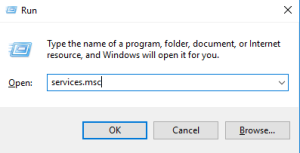
- Open Run Command (Windows Key+ R), type:

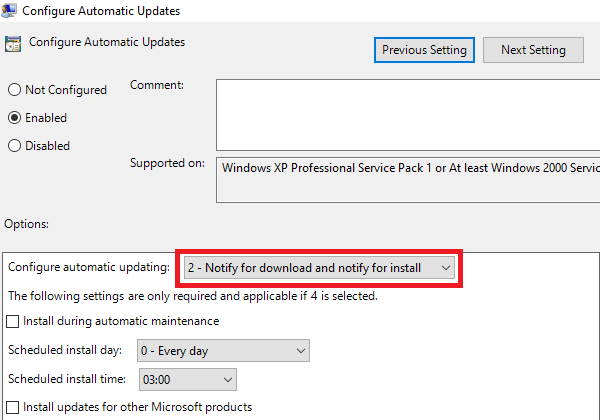
- Go to Computer Configuration→ Administrative Templates→ Windows Components→ Windows Update→ Configure Automatic Updates.
- Now, Configure automatic updating to 2 – Notify for download and notify for install.
- Now go to the Settings app, check for updates (this will apply a new configuration setting), and restart your computer.
For Windows 10 Home users, you can use the registry editor hack as follows:
- Open run command (Windows key+ R), type:
- Go to HKEY_LOCAL_MACHINE→ SOFTWARE→ Policies→ Microsoft→ Windows→ WindowsUpdate→ AU.
- Now, at AU, create a value called AuOptions with 32-bit DWORD, and in “Value Data,” enter “2” and hit OK.
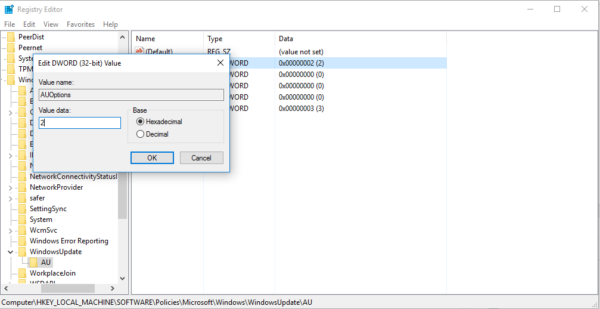
- Now check for updates from settings (it will apply a new configuration) and restart your PC
Method 3: Disabling Windows Update Service
Windows update is a process that can be stopped in very few steps.
- Open Run Command (Windows Key + R), type:
- Find Windows Update Service and open it.
- Set the startup type to→ Disabled.
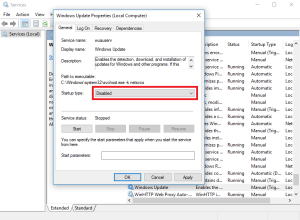
- Restart your PC.
You can change your preference whenever you want; follow the above steps.
Method 4: Show/Hide Tool
It is not a part of Windows 10; instead, it is a tool provided by Microsoft.
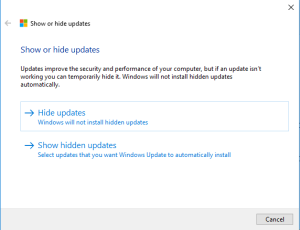
Unlike the above methods, this tool does not prevent automatic updates from being downloaded and installed in the background. It only allows you to hide specific updates from Windows 10. So, if any update creates problems and system errors, you can uninstall it, and the Windows Update service will not automatically download and install that particular update.
This is it! Here are a few easy tricks to prevent automatic updates in Windows 10. Though I will suggest you leave the auto-update as it is. It is a good thing that Windows 10 updates itself automatically. But, Microsoft should provide more control over the update process as they did in previous versions of Windows. Maybe they Will!
Until then, you are stuck with the above tricks. Do share this post with your friends. If you have any questions feel free to comment below. Suggestions and feedback are welcomed. Stay tuned for future updates.