


How to Install Android OS on a Computer
Many of you might have dreamt of using Android and Windows alongside each other on your system

Many of you might have dreamt of using Android and Windows alongside each other on your system. Android may be the most popular mobile operating system globally, but it hasn’t been able to crawl into the computer world yet.
Well, don’t give up on your dream so easily. It may not have been made for desktop users, but that doesn’t necessarily mean we cannot install it on your system. There are several ways by which you can get Android on your desktop.
One of the popular ways is – Bluestack, a software that can run Android apps on your Windows computer without requiring the physical installation of the OS. The other methods include installing Remix OS, Installing Android-x86, and using Android Emulators. So, without further ado, let’s get right into it.
Using Android-x86
As we know, Android is an open-source project, which means it is available for anyone to modify. So, Android-x86 is made out for experiencing Android for anyone who owns a computer. As of today, their latest build is available based on Android 7.1.2 Nougat. You can install it on your PC, just like Windows or Linux.
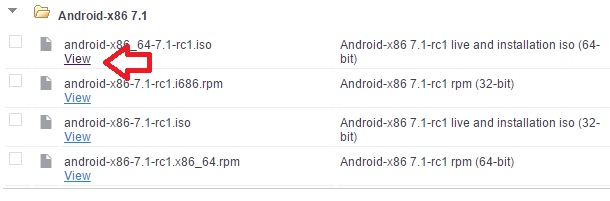
Download Android-x86
It can be beneficial if you have an ancient computer in your home. Old machines can’t keep up with today’s OS and software performance levels. But, Android-x86 can run smoothly on old devices, putting them to good use.
There is a downside to this; using the operating system, which is made for touch-based devices, can feel awkward. But you should have no problem if you have a touchscreen device or laptop. You can read our guide on – how to run Android-x86 on your computer for detailed information.
As this project is still in the beta phase and isn’t stable, we recommend not installing it. If you still want to try it out, you can install it on VMware; you can find the Android-x86 image here.
How to Install Android-x86 on VMware

Android-x86 on VMware
You can download VMware from here. Open VMware, select Create a New Virtual Machine, select Typically, and hit Next. Browse and select your ISO image, which you downloaded earlier, and hit Next, type the name you want to give to your virtual machine, and press Next. Assign the disk size of your choice (minimum 16 GB recommended), select Split virtual disk into multiple files, and hit Next.
Now, click on Customize Hardware and assign memory size. We recommend min 2 GB, but you can go up to 4 GB (never allocate more than half of your computer’s memory). You can also assign several processors and cores per processor (we recommend 2). Now, go to display, check to Accelerate 3D graphics, close the prompt window, and click Finish.
Now, your virtual machine will boot up, you can choose to run Android without installation, or you can choose to install it (which should be placed at the bottom). I assume you wish to install it; select the bottom option. Next, select Create/Modify Partition (here mouse will not work, use arrow keys to move and enter key to choose). Select No for GPT partition. Now do these operations in the exact order as I have mentioned, select New→ Primary→ Leave Size as Default→ Press Enter→ Bootable→ Write→ Type Yes→ Press Enter→ Quit.
Now you will see the new partition appeared at the top. Please select it and choose Ext4 and select Yes to format it completely. Select Yes to install the GRUB bootloader and NO for EFI. Select Yes when it asks to install /system directory as read-write. After that, the installation will start. After finishing, you can boot into your Android ecosystem.
Using Remix OS
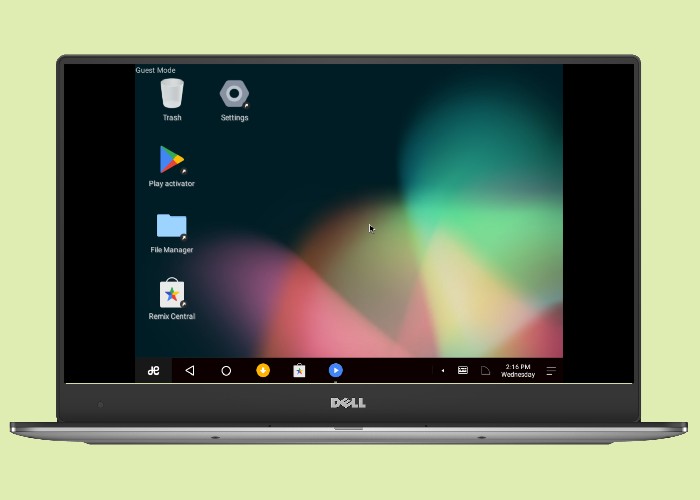
Remix OS
You may not have heard of Remix OS because they might not be so popular, but that doesn’t mean they haven’t created anything remarkable. They have been able to do the one thing which Android-x86 cannot be able to do, which is – true multitasking. The user interface is tweaked for desktop users. It provides a window for apps, a taskbar, an action center, and a Key Mapping tool, which can map touch events on the screen to a specific key (beneficial for playing games).
Here’s the video explaining the essential mapping tool in action.
Writing this article, their latest Remix OS creation was based on Android M (Marshmallow). There are several ways to install Remix OS – USB Drive, Dual Boot with Windows, and VMware. You can find and download Remix OS here.
How to Install Remix OS
Installing Remix OS on a PC is a pretty easy but time-consuming process. You can use any of the three ways explained below to install Remix OS.
USB Drive
Installing Remix OS on USB is super simple; all you need is a USB drive (preferably USB 3.0) with at least 8 GB size and an installation package (Which you downloaded earlier). Once downloaded, unzip the box and start the “Remix OS PC installation tool” included in the package. Select your ISO image, installation type, and drive, hit OK, and that’s it.
When you reboot your computer and boot through USB Drive, it will ask you to select between Resident Mode and Guest Mode. Resident mode saves data between multiple sessions, and guest mode does not.
Dual Boot
You may think dual booting the system is a highly complex process (as we do with Windows and Linux), but in this case, it is straightforward. We must start the “PC installation tool” and select the ISO image like the USB installation. Instead of USB, select Your Hard Disk, choose which drive you want to install with its size, and hit Ok. Here’s the video which explains installing Remix OS along with Windows.
VMware
The procedure for installing Remix OS on VMware is very similar to installing Android-x86. So, here I am only going to explain the different things. When creating a new virtual machine, select Store virtual disk as a single file when you assign disk size. While customizing hardware, the select number of processors to 2. After finishing the virtual machine creation, power on the virtual machine. It will ask you to select between Resident mode – in which machine state and data persist between multiple sessions and guest mode – which does not save any data or state. Now, you will boot into Remix OS, and the boot animation will appear; it may take longer than expected. After booting up, you can complete the setup process and enjoy using Android on your PC.
Using Android Virtual Device
This option is for you if you are a developer and wish to test your Android apps in a natural environment. Google Android Virtual Device Manager, a part of Android Studio, can simulate an entire Android operating system within the confines of your window.
But, using this option as a primary source to run Android for everyday use might not be a good idea as it is pretty sluggish and slow in terms of performance. Since it is only created for keeping app developers and testers in mind, it is rather inconvenient for people to like us to use.
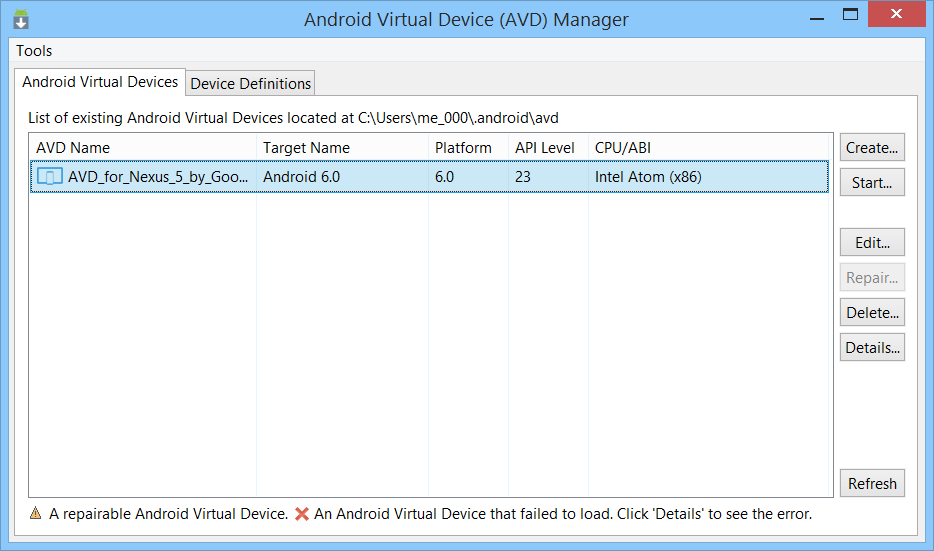
Android Virtual Device
Using BlueStacks
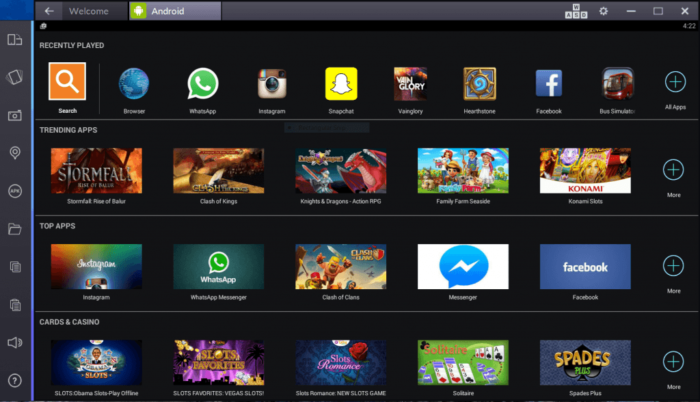
BlueStacks
This method does not physically install any operating system on your computer but runs Android apps within your computer window. If you don’t want to dual boot your system or doesn’t want to install any OS, then BlueStacks is the best way to run Android apps on your Windows computer.
It also includes Google Play Service, which means you can easily install apps from Play Store without any side loading. The performance is also seamless; it can run Android apps with surprisingly healthy speed. But, there is a downside to this. BlueStacks might take a good hit on your PC’s performance and startup speed if you have a system with low specs. Unlike many competitors, it is an excellent option with good performance and a seamless experience.
So, what methods will you use to install Android on your computer? Have any questions? Let us know in the comment section down below.