


How to Run Android on Your PC
Android is the most popular mobile operating system right now.
Android is the most popular mobile operating system right now. It has the most extensive user base in the world. While it is spreading its coverage across multiple gadgets like – smartwatches, TV, automobiles, and tablet PCs, it is still behind in the computer industry.
But here’s the thing – Android is mainly based on Linux, which means it is open-source and available for anyone who wants to modify it. So, some guys thought – why not port it to the desktop? And they did it. So, if you are curious enough to see Google’s OS works on PC, let’s get right into it.
Also, here’s good news – you can do it with the things you already have, like – USB Drive, SD Card, and your laptop or desktop. The tutorial is mainly divided into two parts – the first part explains creating bootable media, and the second part describes how to run it on your PC.
Step 1: Creating Bootable Media of Android ISO Image
If you have any experience doing a clean installation of Windows or any other operating system, this will be a piece of cake for you. If not, don’t worry! It is not rocket science; this is a relatively easy step.
All you need here is a USB Drive or Memory Card at least 2 GB in size. Before using it, copy everything on that drive because the process explained further will erase everything on that drive.
Next, you will need the ISO image of Android x86; you can download it from their official site here (Don’t worry, it will open in a new tab). Here I will be trying the built Android 7.1.2 Nougat, which is approximately 800 MB in size.
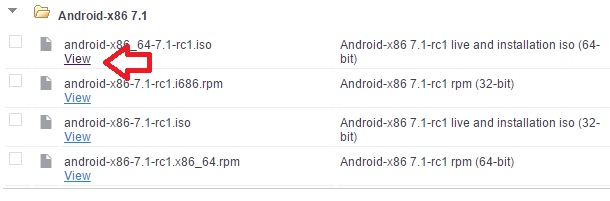
Download Android-x86
You can select the Android version of your choice and download it. It may take a lot of time, depending on your Internet speed, so you might want to bookmark this page. To create a bootable device, you will need a software called Rufus.
There are many other ways to create bootable media, but this is the easiest; the app is roughly 1 MB and portable (works without installation).
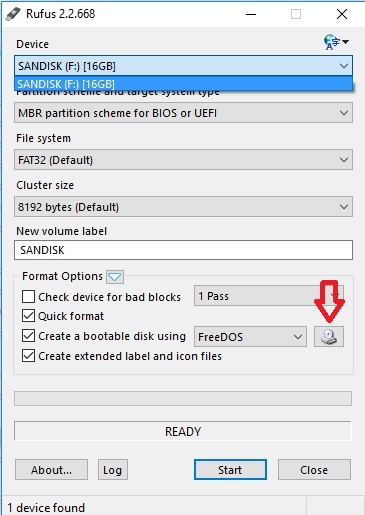
After all the setup and downloading, launch the Rufus and attach the USB Drive to the PC. Rufus will automatically detect the device and select it. If it doesn’t, or you have multiple devices connected to your PC, manually select the USB device from the drop-down menu.
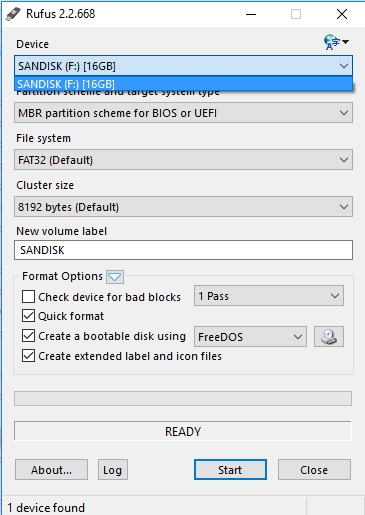
Select USB Drive From Drop-Down Menu
Now, at the bottom, find the line “Create a bootable disk using,” and select ISO image from the drop-down menu.
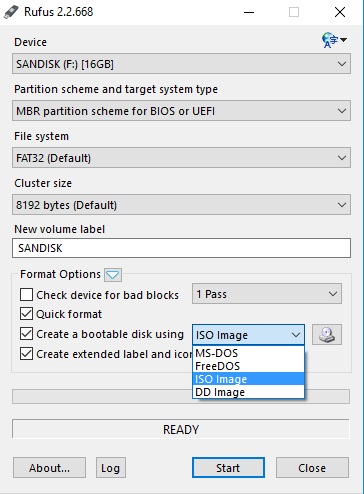
Select ISO Image from Drop-Down Menu
Click the icon next to the drop-down menu, which looks like the CD-Drive icon, and choose the Android x86 ISO image you downloaded earlier.
Click CD-Drive Icon to Select ISO Image
Make sure the file system is selected as FAT32. If not, do it manually from the drop-down menu.
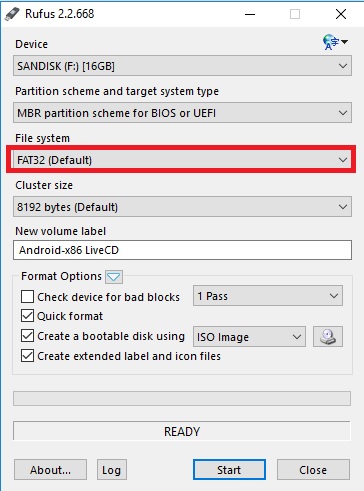
Make Sure File Type is FAT32
Next, click on the Start button as everything has been set up.

Click Start Button
A dialogue box will now appear with a warning that says everything on the device will get destroyed. Click on OK to go ahead.

Rufus
The process will start with completing the necessary tasks and copying all the ISO image data on your drive. When completed, the progress bar will appear green. Now you can close Rufus and eject the drive.
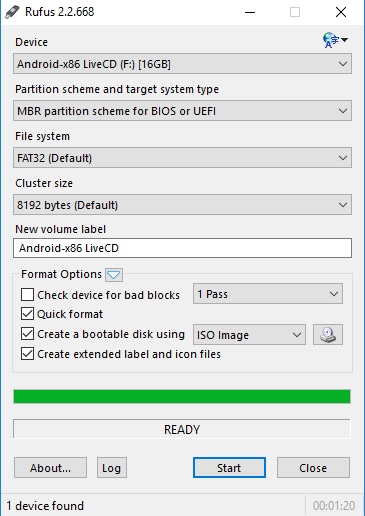
Close Rufus after Completion
Step 2: Boot from Bootable Drive
As we have successfully created a bootable device, the next step is to boot from that device. You will have to reboot your device and access the boot menu.
You may have to change some settings from your BIOS to work; if it works by default, perfect! Start your PC and press a specific key; your PC might have to enter the boot menu. It is mostly F8, F10, F12, or Esc.
When you enter the boot menu, select your boot device (Your USB drive, which was created earlier).
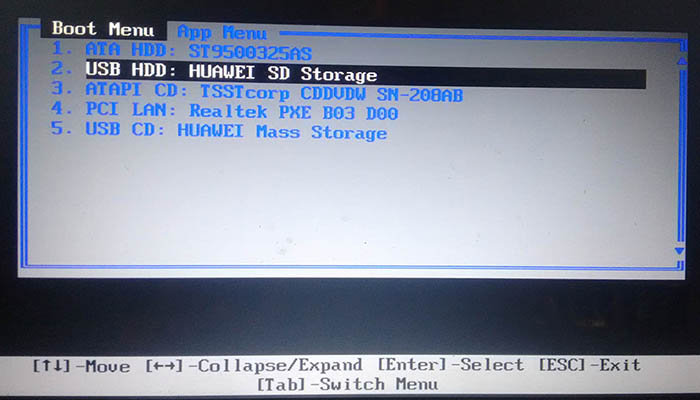
Select Your Boot Device
After successfully booting through your USB drive, a menu will appear asking how you would like to run the installation. The Live CD mode will boot into the operating system without installing it, and the installation mode will install the operating system physically on the hard drive. As we are only trying it out, choose – Live CD – Run Android-x86 without installation.

Select Live CD to Test OS without Installation
After a few seconds of ununderstandable text and command execution, you can see the Android boot animation.
Android Boot Animation
Next, the setup window will appear; the setup procedure is pretty simple, just like you do it on any other Android smartphone. Just follow the on-screen instruction, and you are good to go.
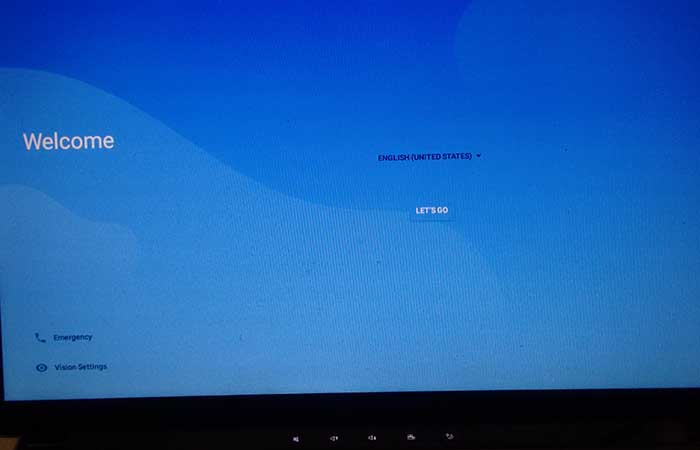
Android Setup Process
Experience of Using Android on Your Computer and Some Tips
The performance of Android on PC is pretty smooth as you expect it to be (considering high-power CPUs). But, using the operating system, which is made for touchscreen devices, is rather inconvenient. The good news is that – the mouse and physical keyboard work fine with Android.

Android-x86 on VMware
Although if you have a touch screen device/laptop, you will feel a lot more positive experience than you think on any Android device.
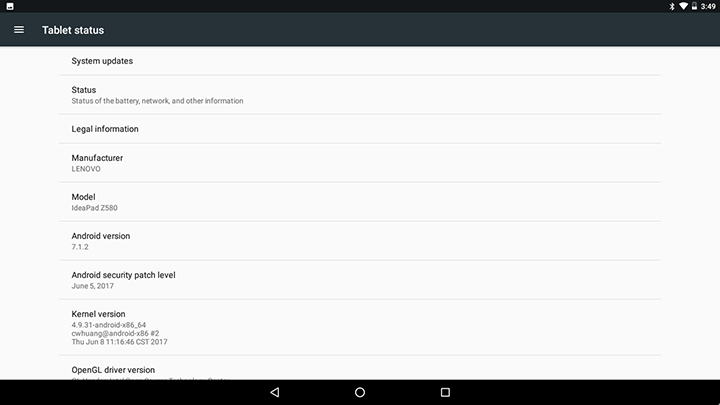
Android Info
All the media keys, like volume, brightness, mute, and other shortcuts for media control, work fine on my system (Lenovo IdeaPad). I cannot say the same about you.
The touchpad gestures like – pinching, zooming, two-finger dragging, and many others work well with this Android build.
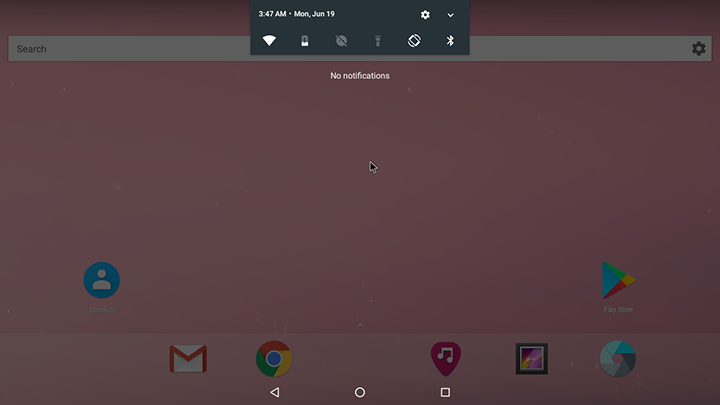
Two-Finger Gesture to Drag Notification Panel
The long-press action also works fine; press and hold the left-click button of your mouse, or you can do the same with your touchpad. The downside here is the right-click; the right-click action doesn’t work with this build.

Android Long-Press Action by Mouse Click
The Windows key works the same as a home button on Android – when pressed, it brings you right back to the home screen, minimizing all apps.
All the wireless capabilities like – Wi-Fi, Bluetooth, and Location worked fine on our test system (Lenovo IdeaPad).
If your laptop has Webcam, it can work fine with the camera app.
If you want to power off your system, press the power button on your PC or laptop, and the Power Menu will appear.
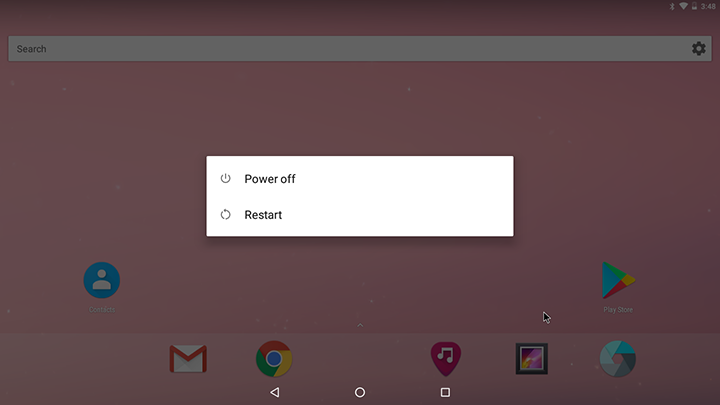
Power Menu
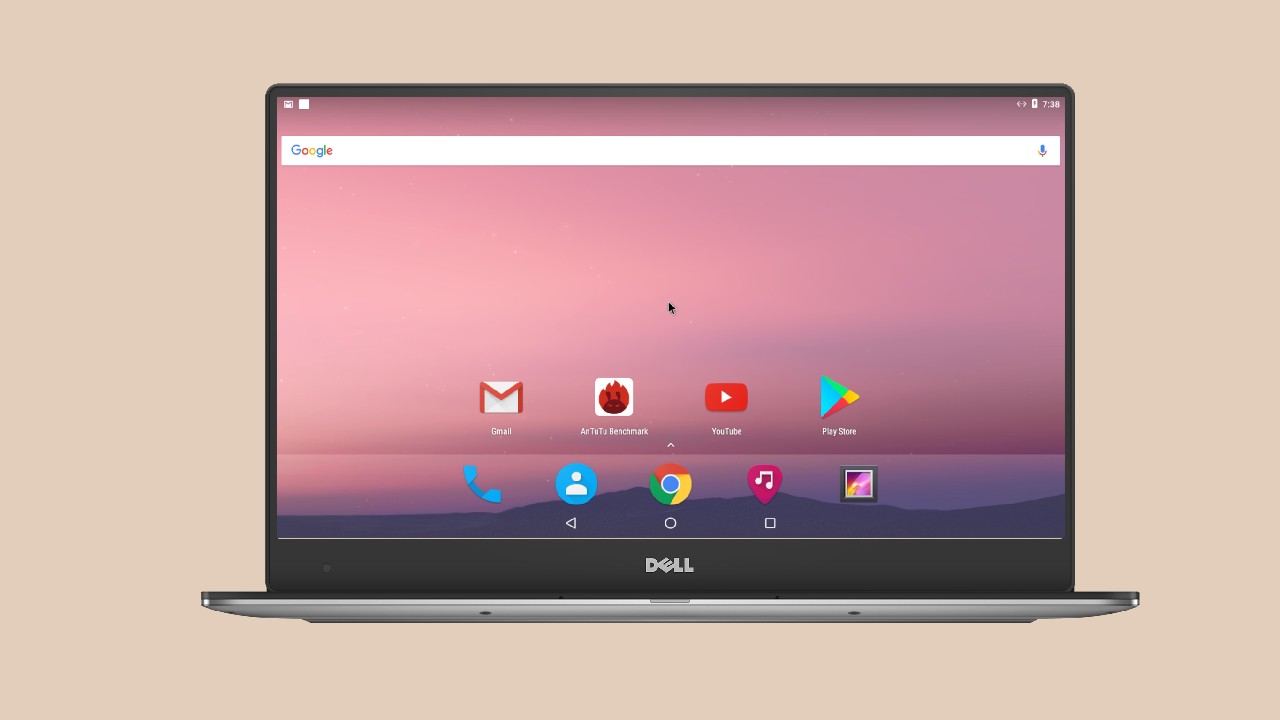
Overall it performs very well, except for some glitches. This building is the same as pure stock Android and comes with a Google play service preinstalled. I have been able to sign in to my Google account and install the AnTuTu benchmark, scoring 3,11,536 (which isn’t bad considering it is higher than any Smartphone available).
But be aware that they couldn’t release a stable build of this project yet. So, if you want to install it on your PC, here’s our advice – Don’t do it. But if you are as stubborn as me and still want to install it no matter the consequences, here’s simple advice with a lot less risk – install it on VMware Workstation or VirtualBox.
Have any questions? Let us know in the comment section below; we would be happy to help.